Archive for the ‘Windows 10’ category

How to Factory Reset Windows 10 from Settings App

July 20th, 2018 by Admin

If your Windows 10 computer starts to run slow or crash frequently, an easy solution is to simply reset your PC to factory default that will quite often solve the issue. This tutorial will walk you through all the steps necessary to perform a factory reset of Windows 10 from the Settings app.

How to Factory Reset Windows 10 from Settings App

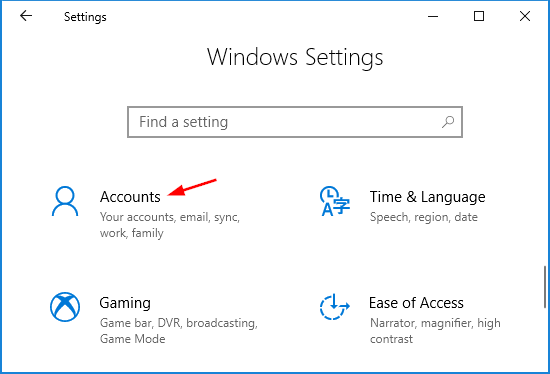
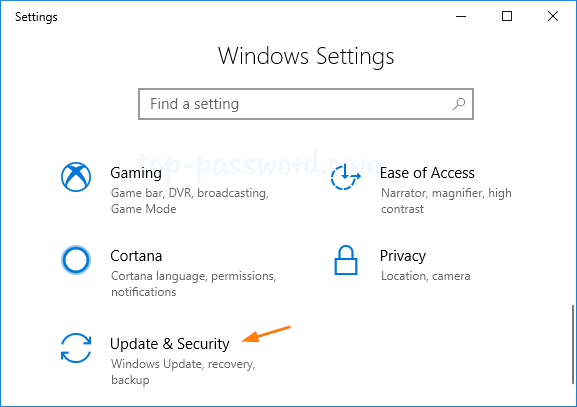
Press the Windows + I keys to launch the Settings app, then click Update & Security.

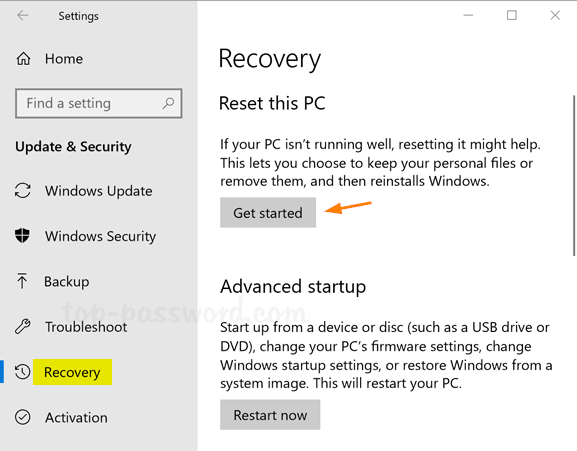
In the left pane, select the Recovery tab. In the right pane, click Get started under the “Reset this PC” heading.

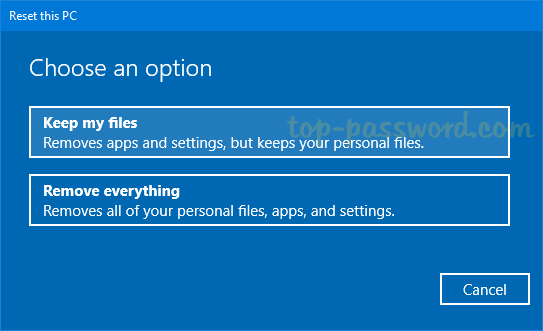
You’ll see a blue dialog box that gives you two choices:

  • Keep my files – This option will remove all apps and settings but keep your personal files intact.
  • Remove everything – This option will format / erase your hard drive so you’ll lose all files and apps.

Keep My Files

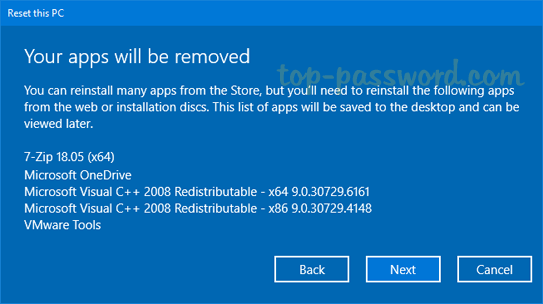
If you’ve chosen the “Keep my files” option, it will not only remove all your apps installed from Windows Store, but also uninstall the programs shown on the screen. Click Next to confirm.

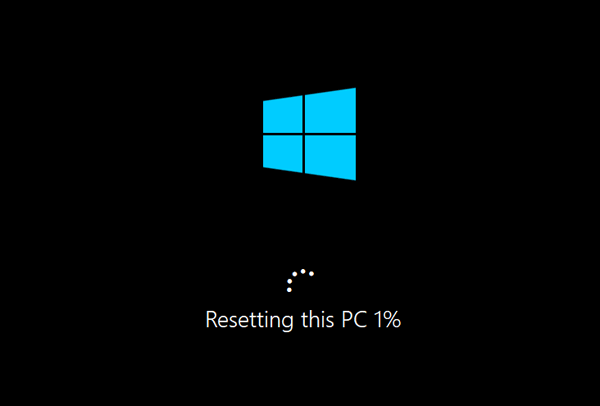
The final step is to click on Reset. Your PC will then reboot automatically and begin the factory reset process.

Remove Everything

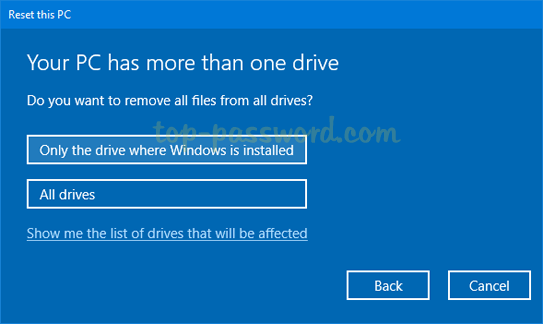
If you’ve chosen the “Remove everything” option, the next screen will let you choose to remove everything from the drive where Windows is installed, or all drives connected to your PC.

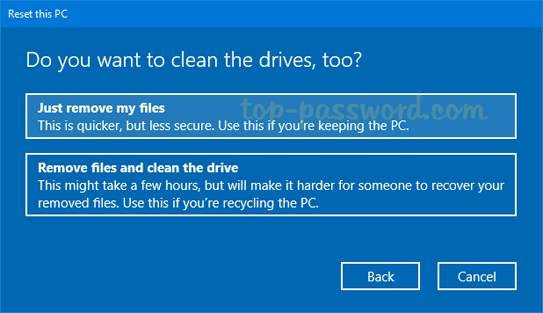
After choosing the drive, you will be asked to “Just remove my files” or “Remove files and clean the drive“. The second option will securely erase your drives and make your files unrecoverable, and it’s a good option if you plan to sell or give away your PC. If you keep the computer, choose the first option for speed.

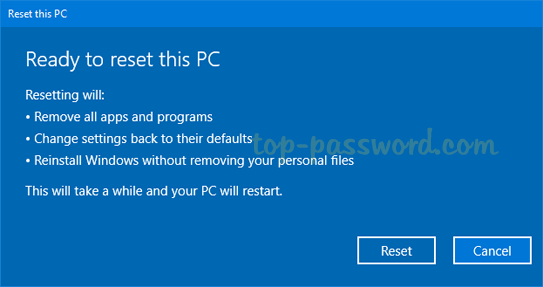
This is your last chance before your computer is wiped. Click on Reset and Windows will then restart and begin the factory reset process immediately.

That’s it!

Easy Ways to Open Calculator in Windows 10

July 19th, 2018 by Admin

How can I create a keyboard shortcut to open the Calculator? Calculator is the built-in app included in all versions of Windows, which lets you quickly calculate the numeric value of expressions. There are many easy ways to open Calculator in Windows 10 — use the Start menu, Cortana, Command Prompt, keyboard shortcut, or pin Calculator to the taskbar.

Method 1: Open Calculator via Run or Command Prompt

Press the Windows key + R together to open the Run box, type calc and hit Enter. The Calculator app will run immediately.

You can also open Calculator by executing the calc command in a Command Prompt window.

Method 2: Open Calculator via Start Menu

Click the Start button. Scroll down to the “C” section in the All Apps list, and you can then access the Calculator program.

In Windows 7 or earlier versions, you can find the Calculator program under the the Accessories folder on the Start menu.

Method 3: Open Calculator via Cortana Search

Click the Cortana Search box in the taskbar, type calc and you can open Calculator from the search result.

If Calculator is one of the most frequently used apps, you can right-click on it and pin it to the Start Screen or the taskbar.

Method 4: Create a Desktop Shortcut to Open Calculator

  1. Right-click any empty space on your desktop and then select New -> Shortcut.

  2. Paste the following into the location box an click Next.
    %WinDir%\System32\calc.exe

  3. Give a name for the Calculator shortcut, and click Finish.

  4. From now on, you can use the newly-created desktop shortcut to open Calculator.

Method 5: Create a Keyboard Shortcut to Open Calculator

Before getting started, make sure you have created a desktop shortcut for Calculator using the Method 4 above.

  1. Right-click the Calculator shortcut on your desktop, and then select Properties.

  2. A Properties window will open. Under the Shortcut tab, click the textbox next to Shortcut key and then tap ‘C‘ on your keyboard. The new shortcut will appear as Ctrl + Alt + C. Click Apply and then OK.

  3. Now, you can press the Ctrl + Alt + C keyboard combination to quickly open Calculator in Windows 10.

4 Ways to Make Your Program Always Run as Administrator

July 18th, 2018 by Admin

Could I force a program to always run as an administrator? Is it possible to automatically open a batch file as admin when you double-click on it? Many old programs need to be run as administrator in order to function properly on Windows 10 / 8 / 7. In this tutorial we’ll show you 4 methods to make your program always run as administrator by default.

Method 1: Always Run as Administrator from Program Shortcut

  1. Right-click on the shortcut of your program, and then select Properties from the context menu.
  2. In the Properties window, select the Shortcut tab, and click on the Advanced button.

  3. Check the box next to Run as administrator and click OK.

  4. Every time you double-click the shortcut it will always run your program as administrator by default.

Method 2: Always Run as Administrator in Compatibility Mode

  1. Right-click on your application or its shortcut, and then select Properties in the context menu.
  2. Under the Compatibility tab, check the “Run this program as an administrator” box and click OK.

  3. From now on, double-click on your application or shortcut and it should automatically run as administrator.

Method 3: Always Run as Administrator Using Registry Hack

  1. Open the Registry Editor and browse to the following key:
    HKEY_CURRENT_USER\Software\Microsoft\Windows NT\CurrentVersion\AppCompatFlags\Layers

    Right-click blank area in the right pane, and then select New -> String Value.

  2. Rename the String value to the full path of the program you want to always run as administrator, and then double-click it to modify.

  3. Type ~ RUNASADMIN in the “Value data” field and click OK.

  4. Close Registry Editor. The program will now open in administrator mode when you double-click it.

Method 4: Create a Batch to Always Run Program as Administrator

  1. Open Notepad (or your favorite text editor), copy and paste the following batch script:
    @echo off :: BatchGotAdmin :------------------------------------- REM --> Check for permissions >nul 2>&1 "%SYSTEMROOT%\system32\cacls.exe" "%SYSTEMROOT%\system32\config\system" REM --> If error flag set, we do not have admin. if '%errorlevel%' NEQ '0' ( echo Requesting administrative privileges... goto UACPrompt ) else ( goto gotAdmin ) :UACPrompt echo Set UAC = CreateObject^("Shell.Application"^) > "%temp%\getadmin.vbs" set params = %*:"="" echo UAC.ShellExecute "C:\Program Files (x86)\Top Password\ISO2Disc.exe", "", "", "runas", 1 >> "%temp%\getadmin.vbs" "%temp%\getadmin.vbs" del "%temp%\getadmin.vbs" exit /B :gotAdmin pushd "%CD%" CD /D "%~dp0" :--------------------------------------

    The above script will make the ISO2Disc utility to always run as administrator. You need to replace the full path of ISO2Disc with your desired application.

  2. Next, save the file by clicking File -> Save. Give it any name you like, but replace the default .txt file extension with the .bat extension.

  3. Now, double-click the batch file and it will then launch your program as administrator.

Forgot Linux Bash Password in Windows 10? How Can I Reset?

July 12th, 2018 by Admin

How can I reset the Bash password of Ubuntu Linux shell in Windows 10? When you install Ubuntu Bash shell on your Windows 10 PC, Windows will prompt you to create a UNIX user account. If you’ve forgotten the password, this tutorial can help you reset it easily.

How to Reset Linux Bash Shell Password in Windows 10?

  1. To get started, open a regular Command Prompt (or PowerShell). Just type cmd in Cortana search box on the taskbar, and you can then click “Command Prompt” from the result.

  2. Next, run the following command to set “root” as the default user for Linux Bash shell.
    ubuntu config --default-user root

    If you’re running Windows 10 Creators update or earlier, you can change the default Bash user to “root” by running this command:
    lxrun /setdefaultuser root

  3. The next time you open the Linux Bash shell, it will log you as root without asking a password. You can use the passwd command to set up a new password for any UNIX user account.
    passwd user_name

  4. The last step is to reset your default user back to your normal Linux account. Type this in the Command Prompt:
    ubuntu config --default-user user_name

    or execute this command:
    lxrun.exe /setdefaultuser user_name

    That’s it!

2 Ways to Enable Remote Assistance in Windows 10 / 8 / 7

July 5th, 2018 by Admin

How do I enable Remote Assistance from the command line? Windows Remote Assistance allows someone else to temporarily take control of your PC over the Internet in order to fix a problem for you. This tutorial will show you how to enable Remote Assistance and allow it through firewall in Windows 10 / 8 / 7.

Method 1: Enable Remote Assistance in System Properties

  1. Right-click on the “This PC” ( or “My Computer”) icon on your desktop and then click Properties.

  2. On the left side of the System window, click Remote settings.

  3. In the “System Properties” window, go to the Remote tab and make sure the “Allow Remote Assistance connections to this computer” check box is checked. Next, click Advanced.

  4. If you clear the “Allow this computer to be controlled remotely” checkbox, the helpers can see your screen, but not take control of your PC.

  5. Click OK to save your changes.

Method 2: Enable Remote Assistance Using Registry Editor or Command Line

  1. Open the Registry Editor and browse to the following registry key:
    HKEY_LOCAL_MACHINE\SYSTEM\CurrentControlSet\Control\Remote Assistance
  2. In order to enable Remote Assistance, double-click the DWORD entry fAllowToGetHelp in the right pane, and set its value data to 1. If you want to disable Remote Assistance, just change it to 0.
  3. Next, double-click the DWORD entry fAllowFullControl and set its value to 1 if you want to allow the person offering the assistance to take full control of this PC.

  4. When you’re done, close Registry Editor.

If you want to make the same registry changes with Command Prompt, just run the following commands to enable Windows Remote Assistance:

reg add "HKLM\System\CurrentControlSet\Control\Remote Assistance" /v fAllowToGetHelp /t REG_DWORD /d 1 /f
reg add "HKLM\System\CurrentControlSet\Control\Remote Assistance" /v fAllowFullControl /t REG_DWORD /d 1 /f

Allow Remote Assistance Through Firewall

What port should I open to allow Windows Remote Assistance? Enabling Remote Assistance using the above methods will not configure Windows Firewall with the appropriate ports to allow remote connections. In order to allow Remote Assistance through Windows Firewall, type the following into an elevated Command Prompt:

netsh advfirewall firewall set rule group="remote assistance" new enable=Yes

That’s it!

How to Open Remote Assistance in Windows 10 / 8 / 7

July 4th, 2018 by Admin

Windows Remote Assistance allows someone (or helper) you trust to take over your PC and provide remote technical support. It’s something similar to TeamViewer or UltraVNC. This tutorial will show you different ways to open Remote Assistance in Windows 10 / 8 / 7.

Method 1: Open Windows Remote Assistance from Run Command

Press the Windows key and the R key at the same time to open the Run command box, type in msra and hit Enter.

This should open up Windows Remote Assistance in no time.

Method 2: Open Windows Remote Assistance via Search

Just click the Start button and directly type “remote assistance“. The search box will show up and deliver the results. Click the option “Invite someone to connect to your PC and help you, or offer to help someone” to launch Windows Remote Assistance.

Method 3: Open Windows Remote Assistance from Control Panel
Open the Control Panel. Type “remote” into the Search box in the upper right corner of the window, and then click the link labelled “Invite someone to connect to your PC and help you, or offer to help someone else“.

Method 4: Create a Desktop Shortcut to Start Windows Remote Assistance

If you need to provide remote technical support to your customers frequently, it’s a good idea to create a desktop shortcut to start Windows Remote Assistance. Follow these steps:

  1. Right-click an empty area on your desktop, and select New -> Shortcut from the context menu.

  2. Type “%windir%\system32\msra.exe” into the location box, and click Next.

  3. Give the shortcut a name, and click Finish.

A new shortcut appears on your desktop. Double-click or tap it, and it will open the Windows Remote Assistance app immediately.

How to View the Fonts Installed in Windows 10

July 2nd, 2018 by Admin

Where are fonts stored in windows 10? In this tutorial we’ll show you 3 quick ways to view all the fonts installed on your Windows 10 computer.

Method 1: View Installed Fonts Using Control Panel

Open the Control Panel and set it to Large icons. Click on Fonts.

You should see all the fonts installed in Windows 10. If you want to check if a specific font is installed or not, just type in its name in the search box to find it.

Method 2: View Installed Fonts from File Explorer

Press the Windows + R keys simultaneously to bring up the Run box. Type fonts and hit Enter.

It will open the folder C:\Windows\Fonts in File Explorer and you can view all fonts installed on your computer.

Method 3: View Installed Fonts from Settings App

Open the Settings app and click Personalization.

Select the Fonts tab in the left side, you’ll see a list of all the fonts installed on your PC.

Just choose a specific font and you can preview or delete it if you like.

How to Open Color Management in Windows 10 / 8 / 7

June 28th, 2018 by Admin

Colors on your monitor look weird or is it darker than normal? If your monitor’s color and brightness are messed up, you can use the Color Management to calibrate your monitor by installing the proper color profile to help get more accurate colors. In this tutorial we’ll show you quick ways to open Color Management in Windows 10, 8 and 7.

Method 1: Open Color Management via Search

Click the Start button and then type “color management“, click on the Color Management shortcut that appears as the first result.

Method 2: Open Color Management via Run

Press the Windows key + R together to get to the Run dialog box. Type colorcpl and press Enter to launch Color Management.

Method 3: Open Color Management from Control Panel

Open the Control Panel. Select Large icons from the “View by” drop-down menu on the upper-right corner, and you can then access the Color Management utility directly.

Method 4: Open Color Management from Command Prompt or PowerShell

When you’re at the Command Prompt, type colorcpl and hit Enter. This will open the Color Management window immediately.

Another similar way is to run the same command in Windows PowerShell console.

Conclusion

Calibrating your monitor is a simple task to help you make sure colors look as accurate as possible on your computer’s screen. If you need to switch the color profile as often as you want, it’s necessary to create a desktop shortcut to access the Color Management utility (c:\windows\system32\colorcpl.exe).