‘Do Not Disturb’ is an useful feature in Windows 11, which can silence notifications from apps, system updates or alerts, so you can stay focused during a meeting or game without distractions. In this tutorial we’ll show you the most common ways to turn on ‘Do Not Disturb’ in Windows 11.
Method 1: Use System Tray to Turn on ‘Do Not Disturb’
- Click on time and date in the system tray on the far right corner. When the notification center pops up, click the bell icon in the top-right corner.
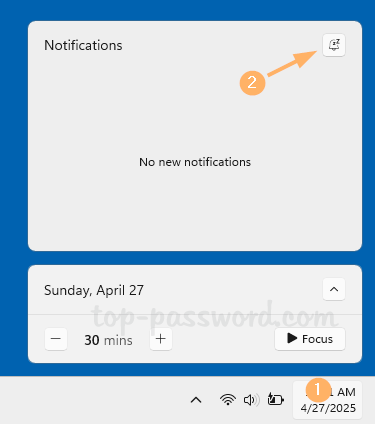
- It will enable the ‘Do Not Disturb’ mode immediately and you’ll see the bell icon on the right side of the taskbar. If there is no bell icon, Do Not Disturb is currently turned off.

Method 2: Use Settings App to Turn on ‘Do Not Disturb’
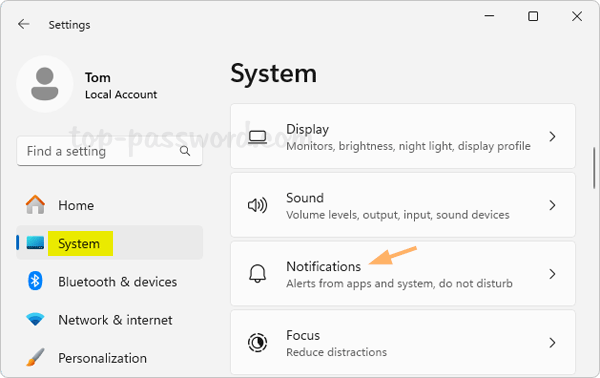
- Press the Windows key + I keyboard shortcut to open the Settings app. Choose System in the left sidebar and click Notifications on the right.
- You can either turn on ‘Do Not Disturb’ by flipping the “Do not disturb” setting to the On position,
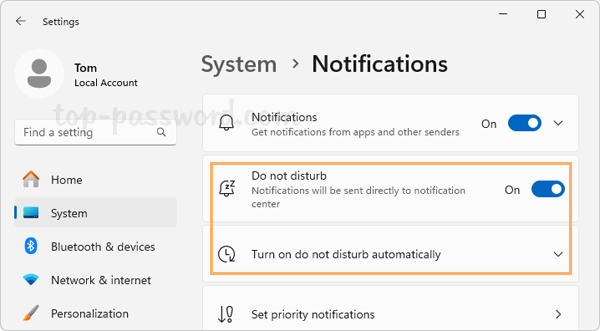
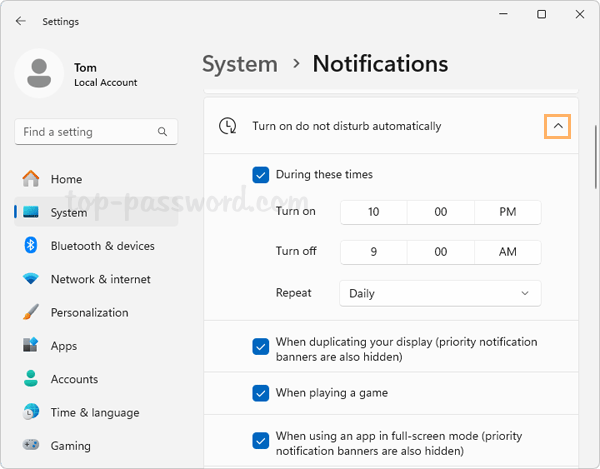
or click the “Turn on do not disturb automatically” to expand its settings. From there you can schedule quiet hours, or tick the box “When playing a game” or others to configure when the ‘Do Not Disturb’ should be activated automatically.
Conclusion
The above methods allows you to turn on ‘Do Not Disturb’ easily on your Windows 11 computer. In addition, you can also turn on “Do not disturb” by starting a Focus session.